

One of the advantages of purchasing an old fixer-upper for a home is acquiring a lot of old
Say hello to my little friend.

This could have easily been thrown away. Our 100 year old house does not use it anymore. The chipping, rusting metal is not quite user friendly. That's what I call potential. I knew immediately when I saw it, it would become useful again in our home.
What you will need for this project:
Old vent/grate
Fabric of your choice
Hot Glue Gun & Glue sticks
Ruler
Scissors
Twine
Sandpaper
Hammer and a Nail

Start by rinsing all of the cobwebs, dust and dirt off of your vent. Give it a nice pat dry or simply let it set out to dry. (You are so patient.)

Now, if you would like to paint your vent before moving on with this project, now would be the time to do so. For this particular project, I was going for the industrial/feminine look. So, I left it be.

Using a light grit sandpaper, lightly sand all of the corners, edges, and front of the grate to give this beauty even more age. If there is any peeling, this will help smooth that out too. It should look something like this:

And... your sandpaper will look something like this:

Turn your vent over so you are are looking at the back side. Measure the inside of the vent, where the opening is. Mine happened to be 12" X 8".
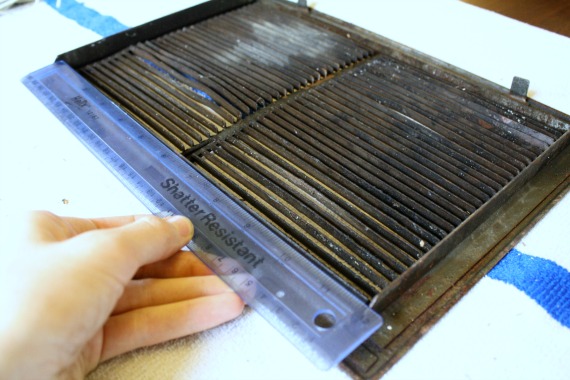

To accomodate for where I needed to glue the fabric to the vent, I added a 1/2" to each side. So I measured and cut 13" X 9".

Lay your fabric right side down centered with the vent.

Wait until your glue gun is very hot and add a line of glue on each side, pressing the fabric into the glue, one side at a time. The idea is just to hold the fabric in place, it will not hold up to a lot of handling.

Once you've glued each side, trim any excess fabric hanging over the edges.

It should look something like this:

Turn your vent over. You're almost done!

Since the vent I used was attached to a base and used on a wall, I had these handy little holes to work with. Otherwise, you could easily drill holes in yours. Pull your twine through one hole toward you and guide it through to the opposite hole.

Do the same thing a second time.

Now is when you need to decide how much twine you want it to hang from. Keep pulling and adjusting at the bottom until you get the length you want.

Now, cut and tie a knot in the back. It should look like this:
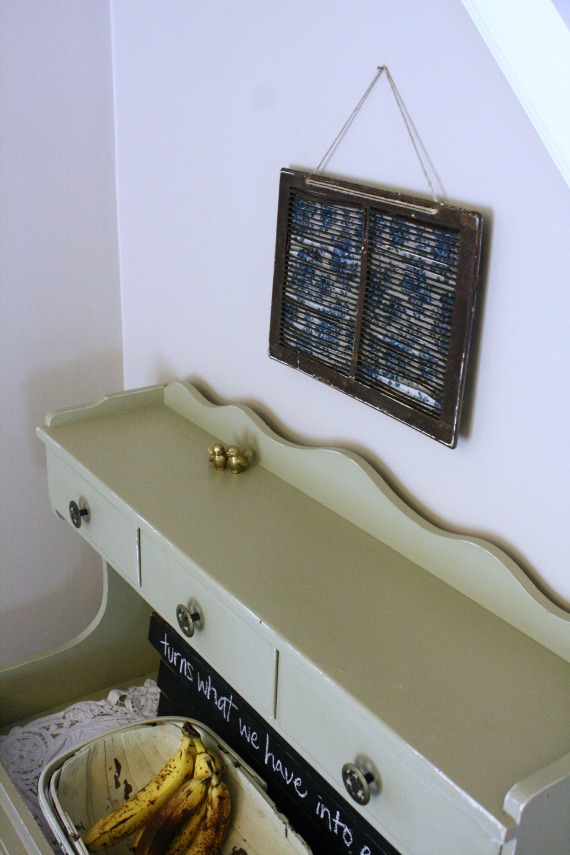
You are done!!

Now find a cozy little spot on the wall and hang!
(See that Gratitude sign? A soon to come tutorial on that too!)

Some of my favorite pieces in our home are those that were made new. Loved again. Treasured. Enjoy!

I think they enjoyed this project just as much as mama.


No comments:
Post a Comment
Thanks for visiting! We love to read your comments on our projects. When you leave a comment it may not post immediately, but don't worry we will see it!