Pages

Thursday, November 28, 2013

Happy Thanksgiving

Happy Thanksgiving to one and all!  You may be watching the parade this morning.  You might be watching football or a movie marathon on tv.  Or you may be cooking feverishly in the kitchen.  Or perhaps you are just lounging on the couch, resting up for the huge meal. 

I do not have a huge craft project to show to you today.  If you do want a last minute idea, I suggest writing your favorite verse about thanksgiving on your chalkboard wall/picture/table/etc.  Because, let's be honest, doesn't everyone have something that is covered with chalkboard paint?


No matter what your plans are for today, let's remember to praise Him for all of His abundant blessings!  I was challenged recently to make a list of 100 things I was thankful for.  I thought I would share them with you today.  They are completely random--that is just how my mind works--but I like to thank my God for the big things and the small.

william, ben, alex, emily, new car, my home, comfy bed, living close to the library, kids' teachers, my parents, tulips, chocolate, birds chirping, xm christmas station, chai, emily's hugs, alex's laugh, ben's heart, christmas movies, books, sharpies, sewing machine, craft room, fun socks, heat, microwave popcorn, my best friend, book club, sew and tell, bible study, mom life, moms' morning out, old friends, new friends, the hide button on fb, the smell of fall, fingerless gloves, the greenway, wrapping paper, our basement, my garlic press, my stoneware, spray paint, pinterest, porch swing, auctions, librarians, childcare workers, lake michigan, grandparents, my husband's family, freedom to worship, flip flops, my salvation, Jesus' never ending love, blogs, printables, the smell of fresh cut grass, the smell of chocolate chip cookies baking, colorful fabric, my piano, mp3 player for when i'm running, wood floors, my health, my kids' health, the zoo, starbucks, snow, harper, ikea, our parks department, laughter, rain, sunshine, brother branham, brother coleman, shutterfly, my bike, pool, dad's garden, mountain dew, a&w root beer, barqs red cream soda, medicine, summertime, street fair, the Bible, van gogh, london, boston, disney world, arizona in february, polka dots, argyle, plaid, washing machine, dryer, dishwasher, ac, classic film, rainbows, chapstick, smiles, prayer, private jokes, naps, tickling, christmas lights

I wish you all a Blessed Thanksgiving!

Wednesday, November 27, 2013

Thankful

I have so much to be thankful for this year (and every year).
Here are a few of the things I am thanking God for this year.

Beautiful sunrises.


God's plan.
The adventure we have been on this last year.
My family.  All of them--even the crazy ones.  ;)

Cherished moments together after a long time apart.

Family game night and all the extra time we have had together this past year.
Homeschooling--even on the tough days.


Quiet time studying my bible.


That I have a husband who is 'boring'.  I also love that he helps me break out of box, and that he compliments my introvert nature so much.


All the men and women who at some point signed a contract stating that they would sacrifice themselves for the country they love.


Our country.  Our freedoms.  The community we live in.  I am thankful for family close by who drop by unexpectedly to say hello.  


What are you most thankful for this year?

Tuesday, November 26, 2013

A Thankful Place Setting


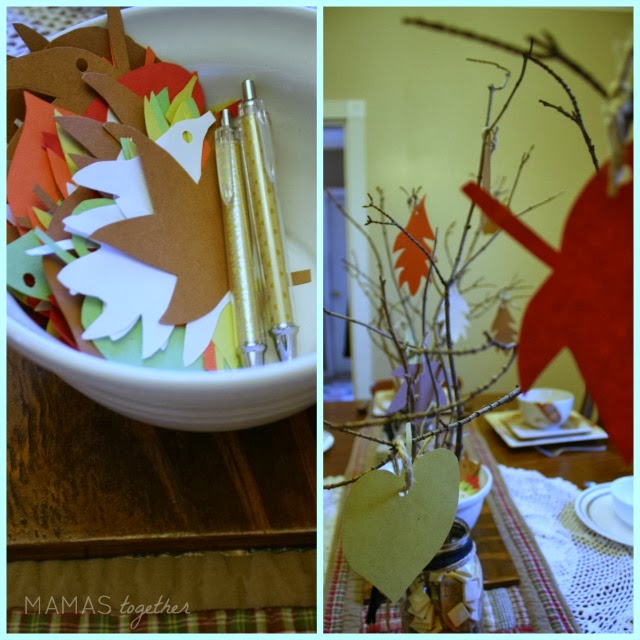
After making my Thankful Tree, I decided this would make a great centerpiece and wonderful activity to do during our Thanksgiving dinner with family. What a perfect way to write down, reflect upon and share what you're thankful for. 

These sweet little place cards are a perfect way to direct loved ones to their seat.  


I hope you have a wonderful Thanksgiving, reflecting on what you're thankful for.

Monday, November 25, 2013

Thanksgiving Place Card Printables & DIY Placemat

Yes, I've been guilty of dreaming of Christmas before Thanksgiving, but that doesn't make me any less thankful for what I have, and it doesn't mean that I don't fully enjoy Thanksgiving. In fact, this year Thanksgiving is giving me something that Christmas won't - time with one of my out-of-state sisters-in-law, Maggie. And for that, I am truly thankful.

Something else I'm thankful for is when something comes along to make things easier - and that's why I'm passing along a quick place card printable that will dress up the table with little-to-no work on your part. 

To download the cards, click on this link. These place cards are set up to be tent cards and will be printed six per page. You can then write in the names of your guests. If you're not confident in your handwriting, you can always upload the image into Microsoft Publisher or Picmonkey and add text. Please remember to turn the text upside down in the necessary spots. When I did this, one of my cards looked like this:

If you're interested, the font I used was Adler.
                            
But I didn't just want to leave you there, so I printed some off and came up with some ideas on how to use them to create a whole place setting.

One easy way to use them is just to simply print them out and set them up as a tented card in front of or on the setting. You may be thinking to yourself here, "Hmmm, that card doesn't look like the one she shared." And you would be halfway right. Sometimes the best outcomes come from unwanted situations. In this case, we have been really low on ink for a long time, so instead of printing in orange and green, my cards printed out pink and purple. Not very festive. So I just took a gold paint marker and drew overtop. I think the result looks really organic and classy. The beauty here is that you can take this and make it what you want.

Another option for these cards was given to me by my mother-in-law four years ago when Eric and I had our rehearsal dinner. She made place cards for the event and dressed them up by placing them in apples.

I love the natural, earthy look, and it's easy peasy. Just cut a slit in the top of the apple, fold your tent together, and set it inside. 

I love how a few simple touches can completely transform a table. Another thing I did to extend the natural, easy look into this setting was to create a placemat from craft paper. To dress it up, I ran it through the sewing machine with a zig zag stitch and voila! The fun part about this kind of placemat, besides being able to just crumple it up and throw it away at the end of the day, is that you can place a pen at the table and encourage your guests to write down what they're thankful for.


This year, more than anything, I'm thankful for my God, a loving family (both the one I was born into, and the one I married into), a creative mind, and pregnancy. I have known too many women in my life that have recently dealt with infertility or a pregnancy loss. Along with being heartbroken for what they have gone through, or are in the midst of, I have come to recognize just what a blessing it is to be able to conceive and have a healthy pregnancy. Life is an incredibly miraculous thing, and I don't take it for granted for one second. 

And with that, Happy Thanksgiving to all of you and your loved ones. I hope everyone has a wonderful holiday! Now if you'll excuse me, I'm going to go make sure my stretchy pants are washed and ready.

(Whether you use these or not, I would love to see your creative place setting ideas - please head over to our Facebook page and share a picture.)

Thursday, November 21, 2013

F is for fishing


100 points if you spotted R2-D2 in the picture above.  That has nothing to do with fishing.  Or fishing poles.  Or the letter F.  I just like to give away random points.  I'm sure it will make your day brighter.

Ok!  Who is excited that Thanksgiving is one week away?!  I know I am!  I like to keep my cooking very simple in the few weeks before the big day.  My middle guy was in charge of bringing a snack to school this week and so I wanted to do something Easy.  They are learning about the letter F this week and so I always try to make the snack fit with what the children are learning.

Enter the easiest snack ever right behind going out and buying a package of oreos.  And oreos wouldn't work anyway because they don't start with an F.  So...easiest snack ever right behind going out and buying....Fruit snacks!  or Fritos!  or...Fruit!

Back to the fishing poles.
Gather together pretzel rods, string licorice and swedish fish.  (Does anyone know what makes the fish swedish?)


You'll also need a cutting board and a knife.


Tie one end of the licorice around the pretzel rod.

Cut a small slit in the fish.

In the cut, push in the other end of the licorice.

And you've caught yourself a fish on your fishing pole!

Super simple and so fun.  They were a hit with the kids in my son's class.  And now I can relax until next week when the baking of the pies shall commence!

Wednesday, November 20, 2013

Cinnamon Rolls


It is almost laughable that I am writing a post on food today.  I am not the greatest cook in the world.  In fact, I consider it a small win every time I complete dinner without saying, 'I burnt the food' or 'I didn't read the directions the right way' or better still 'Um I didn't have _____ so I just substituted ____.'  Whenever I say these things I am pretty much certain my husband and daughter just know dinner is going to be interesting at best.

These cinnamon rolls are do-able even for me so if you are not a cook have no fear.  If I can make these, so can you.  One thing that I have learned along the way is that fresh ingredients are important.  Don't use eggs that are old or yeast that is old.  It will end poorly for you.

With that, here is what I did.


Mix the yeast, teaspoon of sugar and 1/2 cup warm water together.  The water should be warm, not hot.  


Cream together sugar with coconut oil/butter.  The original recipe I used called for shortening, but we don't normally have that around the house, so I use what I have.

I will be honest.  I don't have a lot of the kitchen equipment one should probably have.  When a recipe says sift, I pull out a colander and shake the flour through there.  It works, and I have more cabinet space.  :)


At this point the yeast should have rested long enough to look like the above photo.  It should be bubbly.  


Next, take the yeast that has been sitting, and pour it in the egg/butter mixture.  Add water, and then the flour mixture.  Having an assistant for these things makes everything go quicker.  I wash the used dishes, while she pours.  Win-win :)

Mix, mix, mix.  If you need to, maybe prop a knee on the counter to get some leverage :)


I transfer the batter into a buttered bowl after it looks like the consistency of bread dough.  I use a dry erase marker to mark where the dough is on the bowl, because quite frankly I can never remember how full the bowl was to begin with.


After the dough has doubled in size (about 4 hours), roll it out onto a floured surface, and make it somewhat rectangular.


Add some butter.


Add brown sugar, cinnamon, and raisins (or whatever you fancy).
Roll it up, cut it up.  Let the rolls rest another 2 hours, and finally bake.  Let cool a few minutes and cover with icing.  Yummy!
Ingredient List
Dough:
1 Tablespoon yeast
1 teaspoon sugar
1/2 cup warm water
2/3 cup sugar
1 1/2 Tablespoons coconut oil
1 1/2 Tablespoons butter
3 eggs
about 6 cups flour
1 Tablespoon salt


Cinnamon Raisin Mixture:
1 cup brown sugar
2 Tablespoons cinnamon
1 cup raisins
5 Tablespoons butter

Icing:
1 stick butter
1-1 1/2 cups powdered sugar
1-2 tablespoons milk (almond milk, or coconut creamer work too)
Any flavors you prefer -- Vanilla, or cream cheese etc.

Mix yeast, warm water and sugar in a small bowl, and allow to sit in a warm place, while continuing onto the next step.  Cream 2/3 cup sugar and butter/coconut oil (you can also use shortening) together.  Slowly add eggs.  Set aside.

Sift flour and salt together.  

Add yeast mixture to cream mixture, and then add 1 1/2 cups warm water.  Slowly incorporate sifted flour into the cream mixture.  I use about 6 cups of flour.  It may take a little less or more depending on where you live.  I mix until it looks like bread dough. 

Grease a bowl and transfer the dough into it covered with a towel.  Let rise about 4 hours, or until it has doubled in size.

Roll out the dough onto a floured surface.  It is not necessary to kneed the dough.  I just work it into a large rectangle shape.  I keep the dough around 1/2 inch thick.  

Brush melted butter onto the dough, and sprinkle the dough with brown sugar, cinnamon, and raisins.  Roll into the classic cinnamon roll shape and cut.  
I had about 30 cinnamon rolls.  At this point you can allow to rise (about 2 hours)  and then bake or place in the freezer to enjoy later.  (You will need to pull them out once they are frozen and wrap them up really well in plastic wrap/aluminum foil).
Bake at 425 for about 20 minutes.  After about 10 minutes, I cover them with foil to keep them from browning too much.
The icing, is just butter, powdered sugar and vanilla mixed together with a mixture until creamy.


Tuesday, November 19, 2013

Painted Words


It can be helpful to keep encouraging words where you can see them and feel their reminder. 

Here are a few that have really struck me recently. 
(I am unsure of their original origin, but they are not mine.):

"Joy is not the absence of suffering, but the presence of God."
"You will find that it is necessary to let things go; simply for the reason that they are heavy."

I absolutely love these and need to see them through out the day. Here is how I thought to display them:

With the first one, I did not use a matte, so I started by using the matte I did have in the frame to trace out the size of fabric I would need. If you don't have a matte to use as a guide, just measure your opening.

For the second frame I did use a matte, so the scrap of fabric doesn't need to be as precise. Just big enough to cover the opening. 

I did iron my fabric a little beforehand to make them smoother.
Here's how they look:

I decided to write out the words in a layout that worked for the frame and just follow that. You could also place the paper under your glass and trace over that to be more precise. 

Any time I see these sized paint containers on the return/clearance rack at the hardware store I grab them. I found several of these for $1.00 each and they are the perfect size for projects like this.

While following the guide I made, just simply paint on your phrase. If you make a mistake you can easily wipe it off with a paper towel while it's still wet, even add a little water if needed. 

The paint will dry quickly, but to speed up the process, I dried it with a blow dryer for a few minutes. 

You are ready to hang!

You can easily change out the fabric for a different look and to take off the paint, just use a razor blade or something with a sharp edge to scrape it off. (Being gentle not to scratch the glass.)

I have several gallery walls in our house and I love having a mix of material, color, shape and size to make a personal and eclectic look.

If you would like something a little less permanent, instead of using paint for the writing, use a dry erase marker meant for a white board. It will give you the same look, while being easy to wipe off often. I have one of these in my kitchen to make lists, write notes, scripture, what ever I need!

I would like to know, what do you find encouraging that you like to look at often? Let me know in the comments below!